There was a problem loading the comments.

Android

Support Portal  »  Knowledge Base  »  Viewing Article

  Print
1. Firstly, open the "Mail" app.

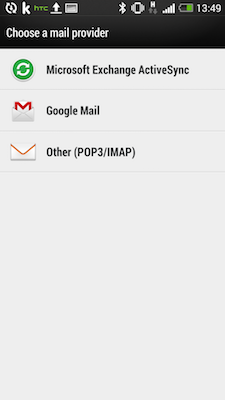
2. Now you will be asked to choose a mail provider. Select "Other (POP3/IMAP)

9fbdacbeb4d9ce1aba526f62f1f1bfb1b981a84d835f191d1b3ec11f97556e42e06ae6971069163d?t=e8e4c1ee978d12874bc243afdfa1001d

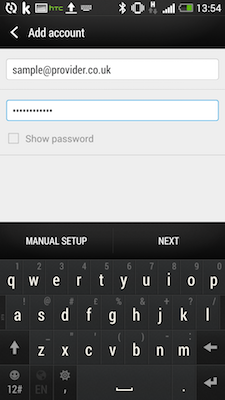
3. Enter the email address and password and click "Next".
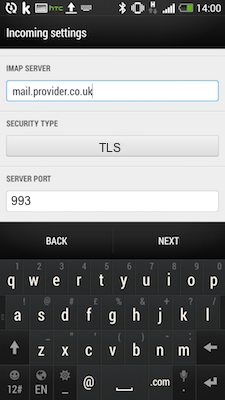
6e0631798f45f4453f878bda34e256380eff6e20097d995642f8dd7a28c34f337a54172a7fffaca6?t=44916e13d90a93ee29515326e3e13aca

4.
You are now required to input the incoming mail server settings. The incoming port for IMAP is 993 with security STARTTLS / TLS. Please ignore the image below which is from a previous version of settings.

d9add5177c60b72ef15d1d4cac108209792b5fd94ac93ca1dab310632627f7bd3e47480573643519?t=9c093f8cb954644e2d8e3cbc3a97e61e

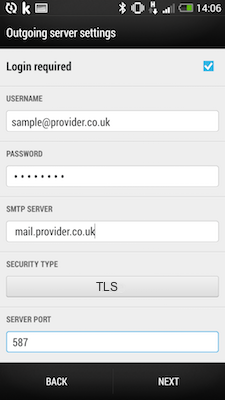
5. Android will check the account settings then ask you to confirm the outgoing server settings.
The username is always the full email address.
The outgoing port is 587.

0ca3b57ca837064521533e916e32495c43e28f2ce46ee28c13a3a18c59315dcf0397a4cac02e0139?t=d0e32e31a6418d129d909a9343bd3c6c

6. You will now be able to click "Next" and Android will finalise the configuration.

Share via
Did you find this article useful?  

Comments

Add Comment

Replying to  

Tags

© xilo