This guide outlines the steps necessary to setup an email account on an iOS device.
1. Firstly, navigate to "Settings" and then "Mail, Contacts, Calendars"
2. Under "Accounts", click on "Add Account".
3. Now you will be asked to choose a provider.
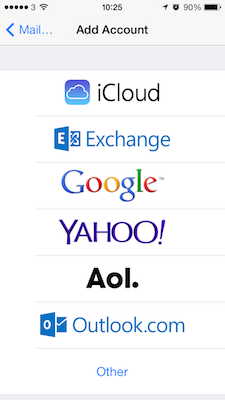
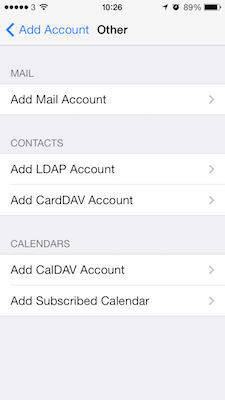
4. Select "Other" and then "Add Mail Account".
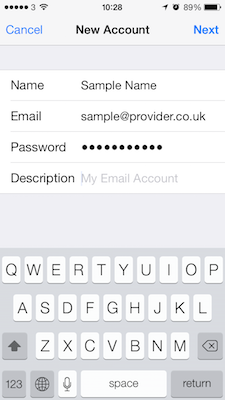
5. You are now required to input the email address and password, along with a display name and account description.
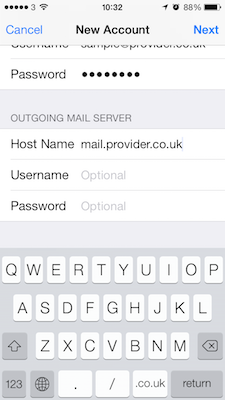
6. You now can add the mail server to both "Outgoing Mail Server" and "Incoming Mail Server"
The username is always the full email address. The same credentials as "Incoming Mail Server" will be used for the "Outgoing Mail Server".
7. You will now be able to click "Next" and iOS will finalise the configuration, asked you which items you would like to be synchronised.